Bespoke craft corner to make the most out of the little space there is in a one bedroom granny-flat.
 This project was a 70th birthday present for a very special person. The gift was to do a make-over of the living/dining area in this
one-bedroom flat. The goal was to find a way to add or fit a sewing and craft station into the tiny space the room has to offer.
As well as choose and fit a new TV stand and display cabinets.
This project was a 70th birthday present for a very special person. The gift was to do a make-over of the living/dining area in this
one-bedroom flat. The goal was to find a way to add or fit a sewing and craft station into the tiny space the room has to offer.
As well as choose and fit a new TV stand and display cabinets.
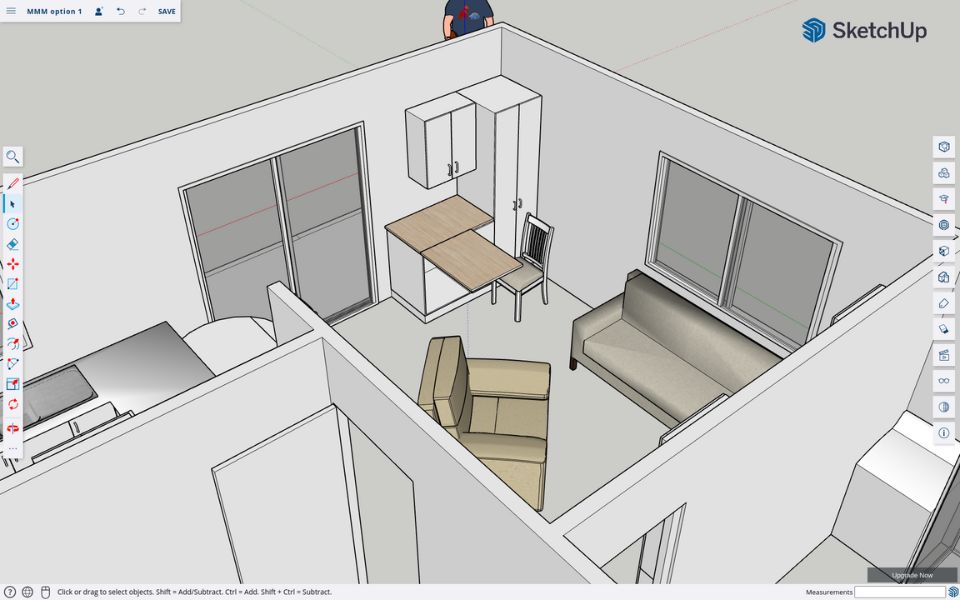
 I modeled the entire flat in SketchUp and proposed 4 different design ideas and orientations for the craft corner and TV wall.
Having it all modeled in 3D was a great way to get a feel for how each design would feel in the small area once built.
After presenting the different designs and ideas we were able to settle on this chosen layout.
I modeled the entire flat in SketchUp and proposed 4 different design ideas and orientations for the craft corner and TV wall.
Having it all modeled in 3D was a great way to get a feel for how each design would feel in the small area once built.
After presenting the different designs and ideas we were able to settle on this chosen layout.
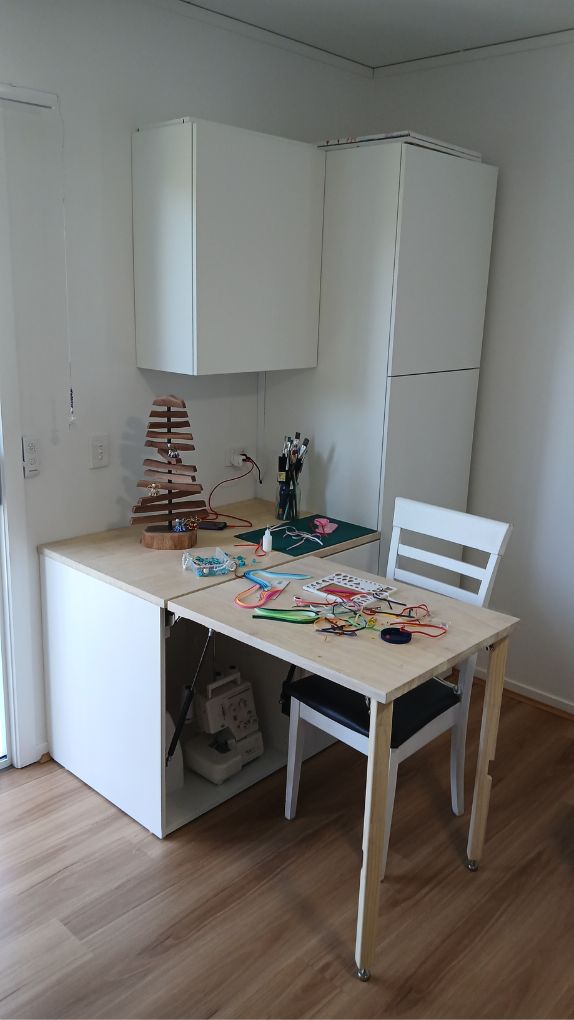
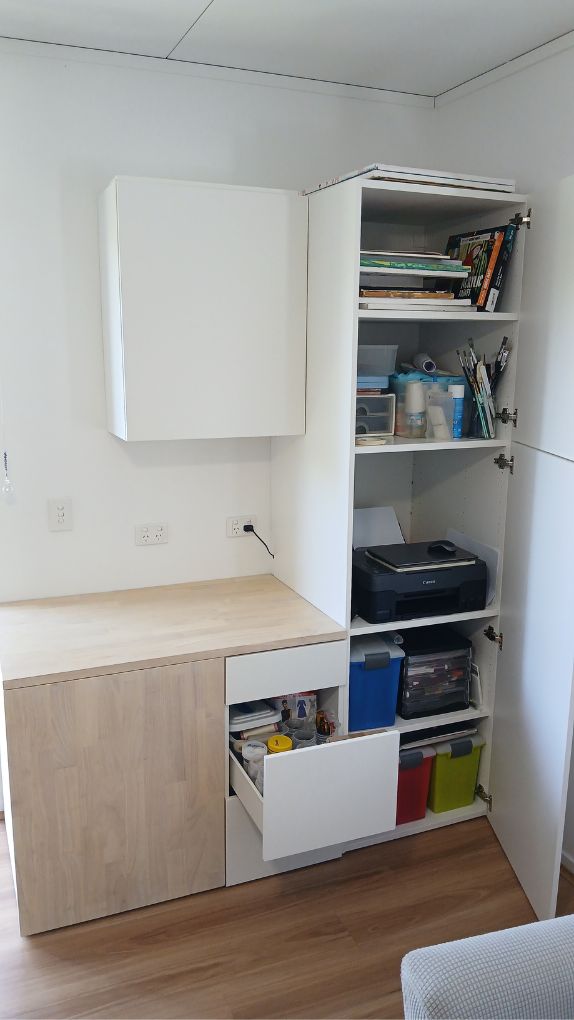
Now with the final design chosen comes the fun part of turning it into a reality. To keep the costs down the cabinets were all modeled off standard sizes, so they could be bought at the usual flat pack stores. So this craft corner is a combination of Ikea flat pack cabinetry, Bunnings timber bench top, and a hand-full of miscellaneous parts.
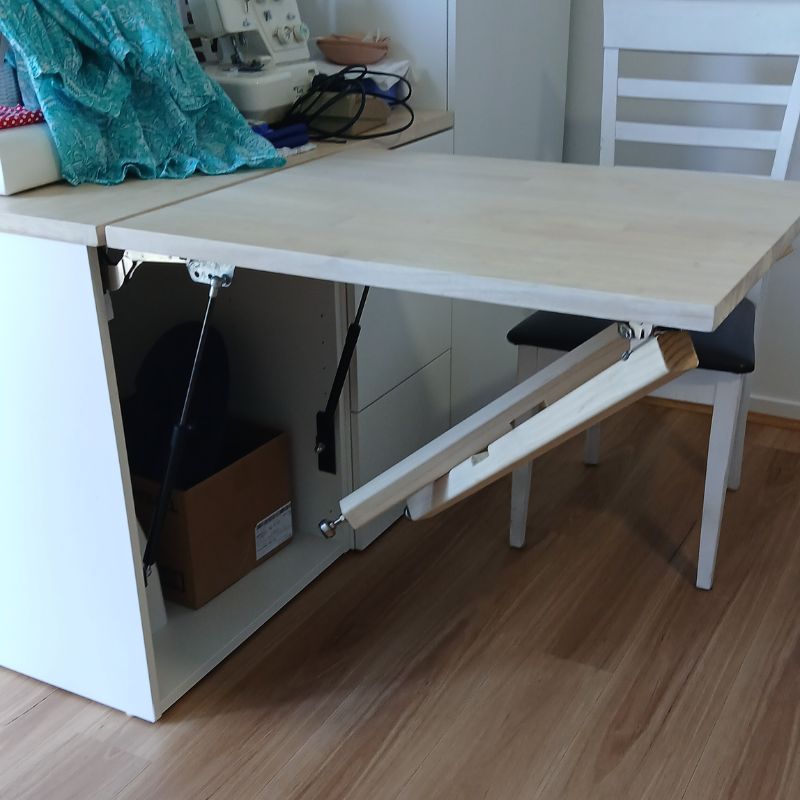
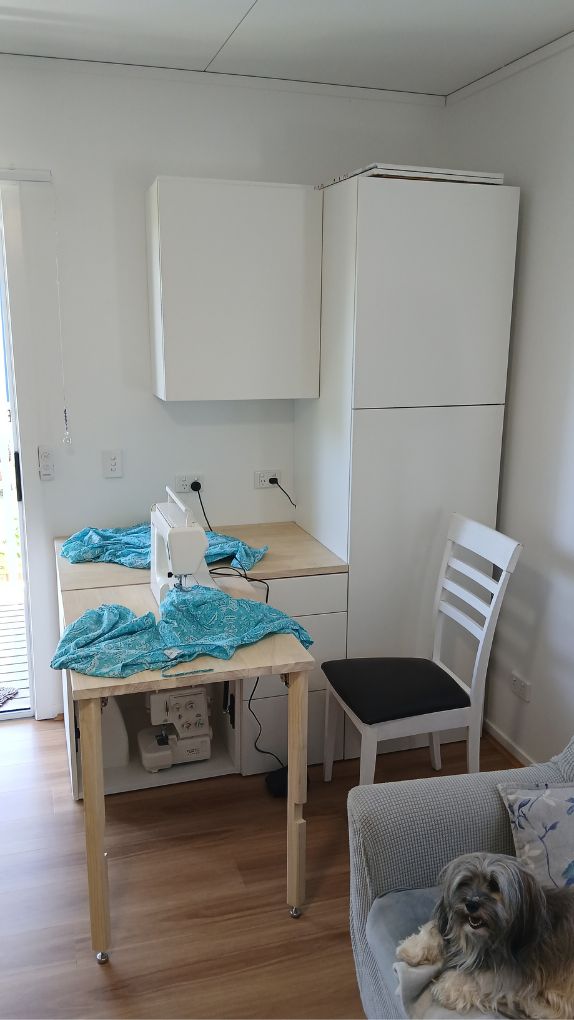
I knew I was going to face some challenges with the flip out table-top. With the biggest challenge being to make it sturdy enough to be able to use a sewing machine on, and at the same time be user-friendly enough that it can easily be lifted out and put away with minimal strength required.
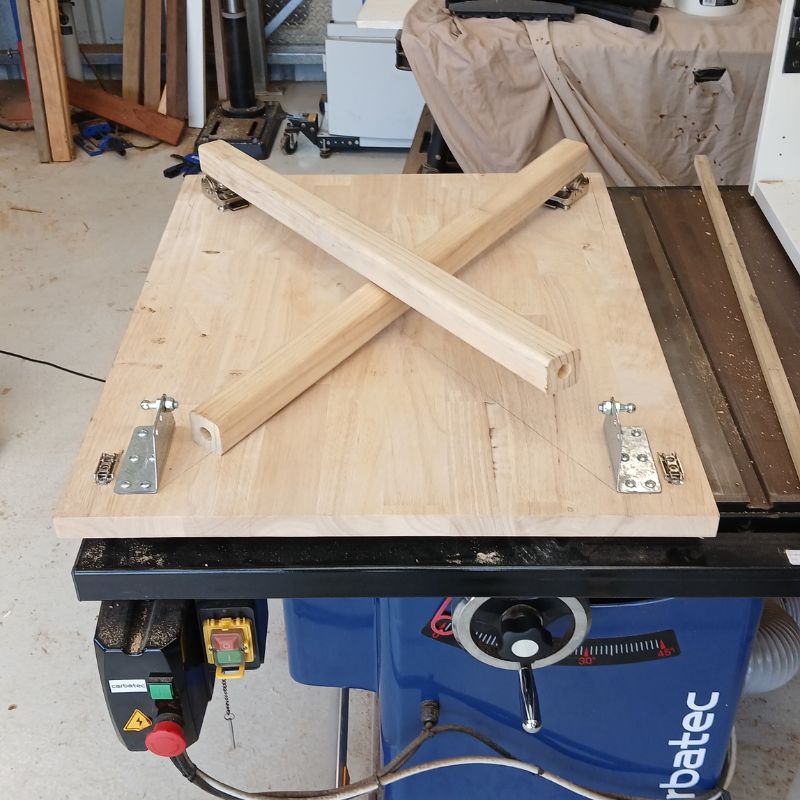
 To hold the weight and downward forces of an active sewing machine meant that it would need legs at the end of the table.
Which also meant that it had to hide those legs when stored away. I chose some readily available 90 degree self-locking folding hinges
for the legs. I would mount solid timber the legs in a diagonal fashion so when they fold up they cross over one another.
This allowed the full length of the leg to fit inside the closed cabinet (Thank you, Pythagoras).
To hold the weight and downward forces of an active sewing machine meant that it would need legs at the end of the table.
Which also meant that it had to hide those legs when stored away. I chose some readily available 90 degree self-locking folding hinges
for the legs. I would mount solid timber the legs in a diagonal fashion so when they fold up they cross over one another.
This allowed the full length of the leg to fit inside the closed cabinet (Thank you, Pythagoras).
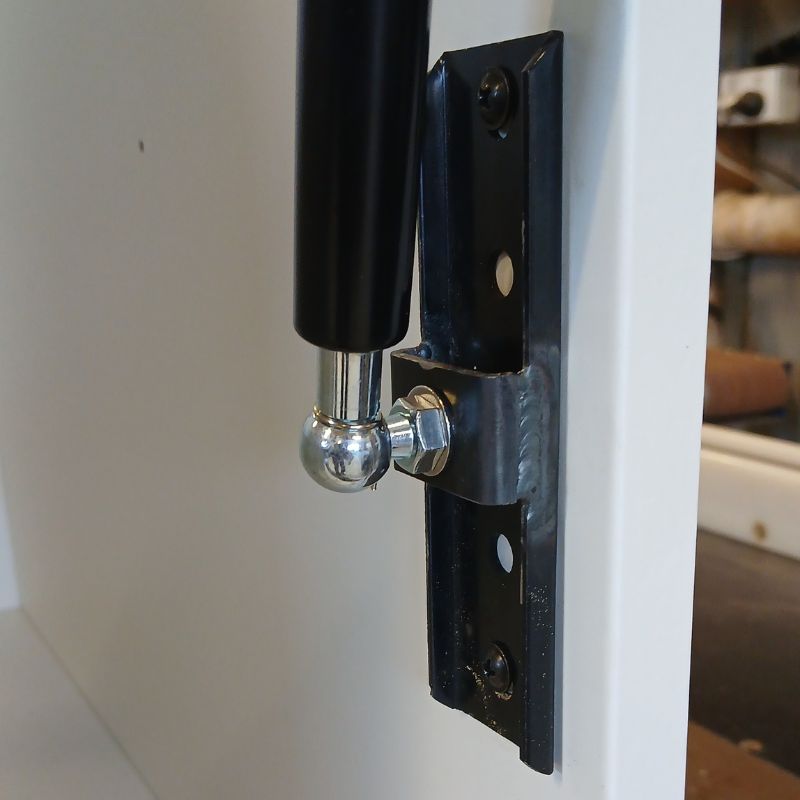
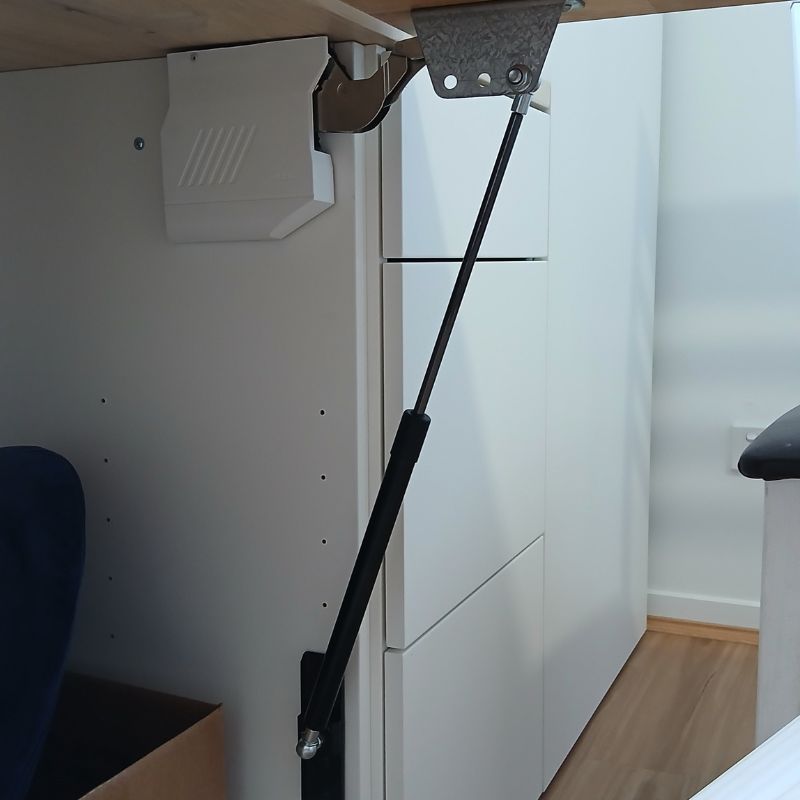
This leg design posed another challenge in that while the legs were being opened or stayed, all the weight of the solid timber bench would be placed upon the operator. This was unacceptable. But if I include gas struts fitted into the design, it would be able to hold the weight of the bench top while the legs were being locked into place.
Now with a welder and grinder in hand, combined with a few off cuts of random pieces of steel found in my shed leftovers bin, I fashioned up some brackets for the gas struts. After a bit of optimizing and trying different load points, I tuned the bench top to hold its own weight in mid-air, while also not pushing so far upwards that it wanted to lift the feet off the floor when the legs are out.
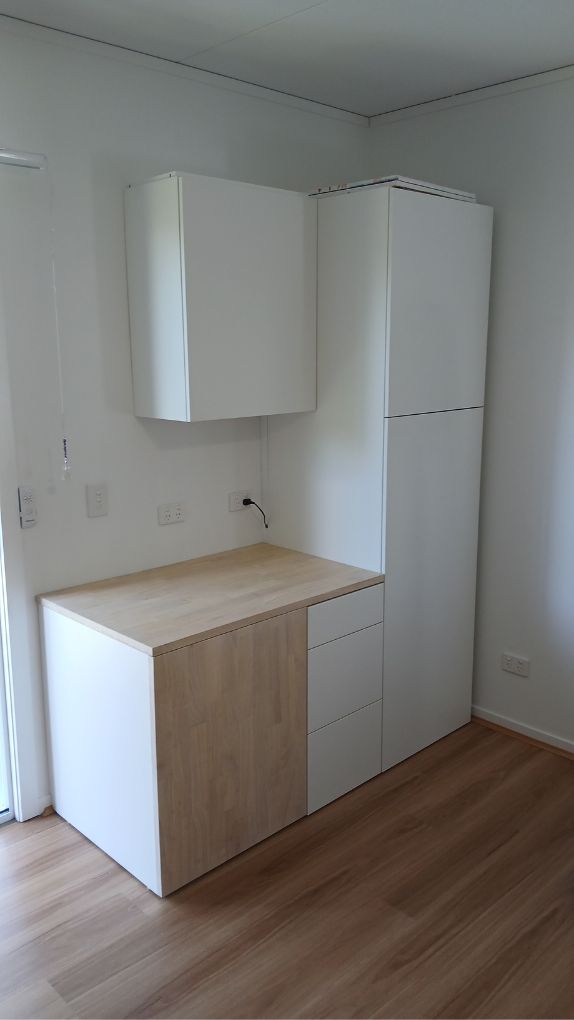
Once the flip out table was finished up in the shed. The finishing technique on the bench top being a light lime wash before two coats of hardwax oil to stop the timber from yellowing. It was time to put it all together and fit it onto the rest of the flat packs in the room.